Keeping a kitchen clean can sometimes feel like an endless task, especially when it comes to appliances that are used every day. Among these, the oven is often one of the most frequently used—and one of the most challenging to keep spotless. Whether you’re baking bread, roasting vegetables, preparing casseroles, or warming leftovers, the oven plays a central role in daily cooking routines. Over time, however, frequent use naturally leads to the accumulation of grease, food residue, and stubborn grime.
Many homeowners discover that even when they try to clean regularly, small splatters and drips can slowly build up. Grease particles released during cooking may settle on interior walls, racks, and glass doors. If left unattended for extended periods, these layers can harden and become more difficult to remove.
Fortunately, restoring an oven to a clean and fresh condition does not necessarily require complicated techniques or expensive services. With a few reliable methods, a bit of patience, and the right cleaning approach, it is possible to tackle even long-standing buildup and maintain a hygienic cooking space.
This guide explores practical and safe ways to clean an oven thoroughly. You’ll also learn about common cleaning ingredients, useful tools, and helpful habits that can keep your appliance in good condition for years to come.
Why Ovens Accumulate Grease and Residue
Before discussing cleaning techniques, it helps to understand why ovens collect grease and grime in the first place.
When food cooks at high temperatures, tiny particles of oil, moisture, and food residue are released into the air inside the oven. These particles often settle on interior surfaces such as walls, heating areas, racks, and doors. Over time, repeated cooking cycles cause these particles to accumulate.
Some common contributors to oven buildup include:
-
Spills from baking dishes or pans
-
Oils released during roasting or frying
-
Food crumbs or drips falling onto the oven floor
-
Steam that carries grease particles onto surrounding surfaces
Because ovens operate at high temperatures, these residues can become baked onto surfaces, making them more difficult to remove with simple wiping alone.
Regular maintenance helps reduce buildup, but many people eventually face the task of deep cleaning their oven.
Preparing Your Oven for a Thorough Cleaning
Before applying any cleaning solution, it’s important to prepare the oven properly. Taking a few preliminary steps can make the cleaning process easier and more effective.
1. Turn Off and Cool the Oven
Safety always comes first. Ensure the oven is completely turned off and cool before beginning any cleaning process. Working with a warm or hot appliance can increase the risk of burns or damage.
2. Remove Oven Racks and Accessories
Take out removable parts such as:
-
Oven racks
-
Baking trays
-
Thermometers
-
Pizza stones
These items can be cleaned separately, allowing better access to the interior surfaces.
3. Protect Surrounding Surfaces
Place towels or old newspapers around the base of the oven to catch drips or residue that may fall during cleaning.
4. Gather Cleaning Supplies
Having all tools ready can make the process smoother. Common supplies include:
-
Soft cloths or microfiber towels
-
Non-abrasive sponges
-
A soft or medium-bristle brush
-
A spray bottle
-
Rubber cleaning gloves
Once your workspace is prepared, you can begin applying the cleaning method that works best for your situation.
Natural Cleaning Method: Baking Soda and Vinegar
One of the most widely recommended approaches for cleaning ovens involves a simple combination of baking soda and vinegar. These ingredients are commonly used in household cleaning because they can help break down grease and neutralize odors.
This method works particularly well for ovens that have moderate grease buildup.
Step 1: Create a Baking Soda Paste
Start by mixing baking soda with a small amount of water until it forms a thick paste. The texture should be spreadable but not runny.
Step 2: Apply the Paste to Interior Surfaces
Using a sponge or cloth, spread the paste across the interior surfaces of the oven. Focus on areas with visible grease or residue.
Be sure to avoid applying the mixture directly onto heating elements or sensitive electronic parts.
You can also apply the paste to the interior side of the oven door, where grease often collects.
Step 3: Allow the Mixture to Sit
Let the baking soda paste remain on the surfaces for several hours. Many people prefer to leave it overnight, which allows the mixture more time to soften stubborn residue.
Step 4: Scrub Gently
After the paste has had time to work, use a soft brush or sponge to gently scrub the surfaces. The loosened grime should come off more easily.
Step 5: Wipe Away the Residue
Use a damp cloth to wipe away the baking soda mixture and dissolved grease.
Step 6: Use Vinegar for the Final Step
Spraying a small amount of vinegar onto any remaining baking soda residue can help dissolve it. You may notice a mild fizzing reaction—this is normal and helps break down leftover particles.
Finish by wiping everything clean with a damp cloth.
Cleaning Oven Racks
Oven racks often collect grease and baked-on residue that can be difficult to remove. Fortunately, several techniques can help restore them.
Soaking Method
One effective method involves soaking racks in warm water mixed with dish soap.
-
Fill a large sink or bathtub with warm water.
-
Add a small amount of dishwashing liquid.
-
Place the racks in the water and allow them to soak for several hours.
-
Use a non-abrasive sponge or brush to remove softened grime.
After cleaning, rinse the racks thoroughly and allow them to dry completely before placing them back in the oven.
Using Commercial Oven Cleaning Products
In cases where grease buildup is especially heavy, some people prefer to use specialized oven cleaning products designed for tough kitchen residue.
These products are typically formulated to break down grease quickly.
General Steps for Using Commercial Cleaners
-
Ensure the kitchen is well ventilated.
-
Follow the instructions provided on the product label.
-
Apply the cleaner evenly to affected surfaces.
-
Allow the recommended waiting time for the product to work.
-
Wipe the surfaces with a damp cloth.
Because cleaning formulas vary, always read instructions carefully to ensure safe and effective use.
Multi-Purpose Cleaning Pastes
Some cleaning pastes designed for household use can also help remove grime from kitchen appliances.
These pastes are typically applied with a sponge and gently rubbed onto greasy surfaces. After loosening the buildup, the paste can be wiped away with a damp cloth.
In addition to ovens, these types of products are often used for:
-
Pots and pans
-
Tile surfaces
-
Shower areas
-
Kitchen counters
Always test any cleaning product on a small hidden area first to ensure it does not damage the surface.
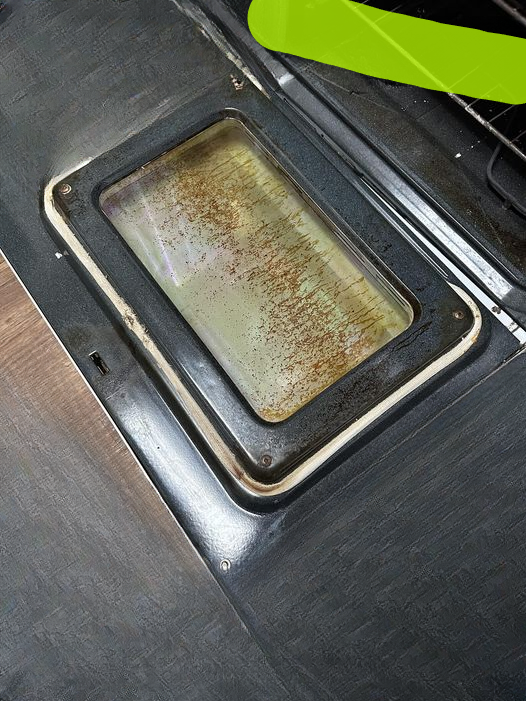
Don’t Forget the Oven Door
One of the most noticeable parts of the oven is the glass door. Over time, grease and cooking residue can create a cloudy or streaky appearance.
To clean the door:
-
Apply a small amount of baking soda paste or glass-safe cleaner.
-
Allow it to sit briefly if grease is present.
-
Wipe gently with a soft cloth or sponge.
-
Finish by drying with a clean microfiber cloth.
Cleaning the door regularly helps maintain a clear view while cooking.
Cleaning Oven Knobs and Controls
Another area that often accumulates grease is the control panel and knobs.
Cooking oils from hands and food preparation can gradually leave residue on these surfaces.
To clean knobs:
-
Remove them if the appliance design allows.
-
Wash them with warm water and mild soap.
-
Dry thoroughly before reattaching.
For fixed controls, use a damp cloth with a small amount of gentle cleaner.
Avoid excessive moisture around electronic components.
Helpful Tips for Maintaining a Clean Oven
Deep cleaning becomes much easier when routine maintenance is practiced.
Here are a few habits that can help prevent heavy buildup:
Clean Small Spills Quickly
If a spill occurs during cooking, wipe it once the oven cools. Removing residue early prevents it from baking onto surfaces.
Use Baking Trays or Liners
Placing a tray under dishes that may overflow can catch drips before they reach the oven floor.
Wipe the Door Regularly
Quickly wiping the glass door every few days prevents grease from forming thick layers.
Schedule Occasional Deep Cleaning
Even with careful use, ovens benefit from occasional deep cleaning every few months.
Signs That Your Oven Needs Cleaning
Sometimes buildup develops gradually and may go unnoticed. Here are some signs that it might be time for a thorough cleaning:
-
Visible grease or dark residue inside the oven
-
Smoke or strong odors during cooking
-
Sticky or greasy oven racks
-
A cloudy or streaked oven door
Addressing these signs early can help keep your appliance functioning properly.
Safety Considerations
While cleaning an oven is generally straightforward, keeping safety in mind is important.
Always remember to:
-
Ensure the oven is completely cool before cleaning
-
Avoid mixing incompatible cleaning chemicals
-
Use gloves if handling strong cleaning products
-
Maintain proper ventilation when using sprays or cleaners
Following these guidelines helps ensure a safe and effective cleaning process.
When Maintenance May Not Be Enough
Most ovens can be restored with proper cleaning techniques. However, very old appliances may show signs of wear that cleaning alone cannot resolve.
If the appliance has problems such as uneven heating, broken components, or significant damage, it may be helpful to consult a professional technician for evaluation.
Regular maintenance and careful cleaning can extend the lifespan of many kitchen appliances.
Final Thoughts
The oven is one of the hardest-working appliances in the kitchen, and it naturally collects grease and residue over time. Fortunately, with the right approach, restoring it to a clean condition can be manageable.
Simple ingredients such as baking soda and vinegar can often help loosen buildup and refresh interior surfaces. For heavier residue, specialized cleaning products may provide additional assistance.
By combining effective cleaning methods with regular maintenance habits, you can keep your oven looking clean, functioning efficiently, and ready for daily cooking.
A well-maintained oven not only improves the appearance of your kitchen but also creates a more pleasant environment for preparing meals.
With a little attention and occasional deep cleaning, your oven can continue serving your household reliably for many years.